In this simple guide, we’ll explain how to install a wall hung basin for your bathroom or cloakroom. This guide is tailored to mounted sinks where there is an existing water supply. Please note, we do not cover how to plumb a basin.
You will need:
- Wall hung basin of your choice
- Measuring tape
- Drill
- Spanner
- Spirit level
- Pencil
A fixings kit suitable for your wall:
- 2 x wall anchor
- 2 x flanged collar
- 2 x nut
- 2 x wall plugs
Step 1 – Decide the height of your basin
First things first, you’ll need to decide what height your basin should be. A standard bathroom sink is usually placed 800-850mm high. However, you may wish to adjust this to suit your needs.
Top tip: Consider your existing water supply position and ensure the water waste and trap will be the correct height.
Step 2 – Measure accurately
Next, you will need to take two measurements;
- The distance from the top of the basin to the fixing holes
- The distance between the two fixing holes
Measure to the centre of each fixing hole, then double-check your measurements are correct before jotting them down onto a piece of paper for later.
Step 3 – Hang your sink
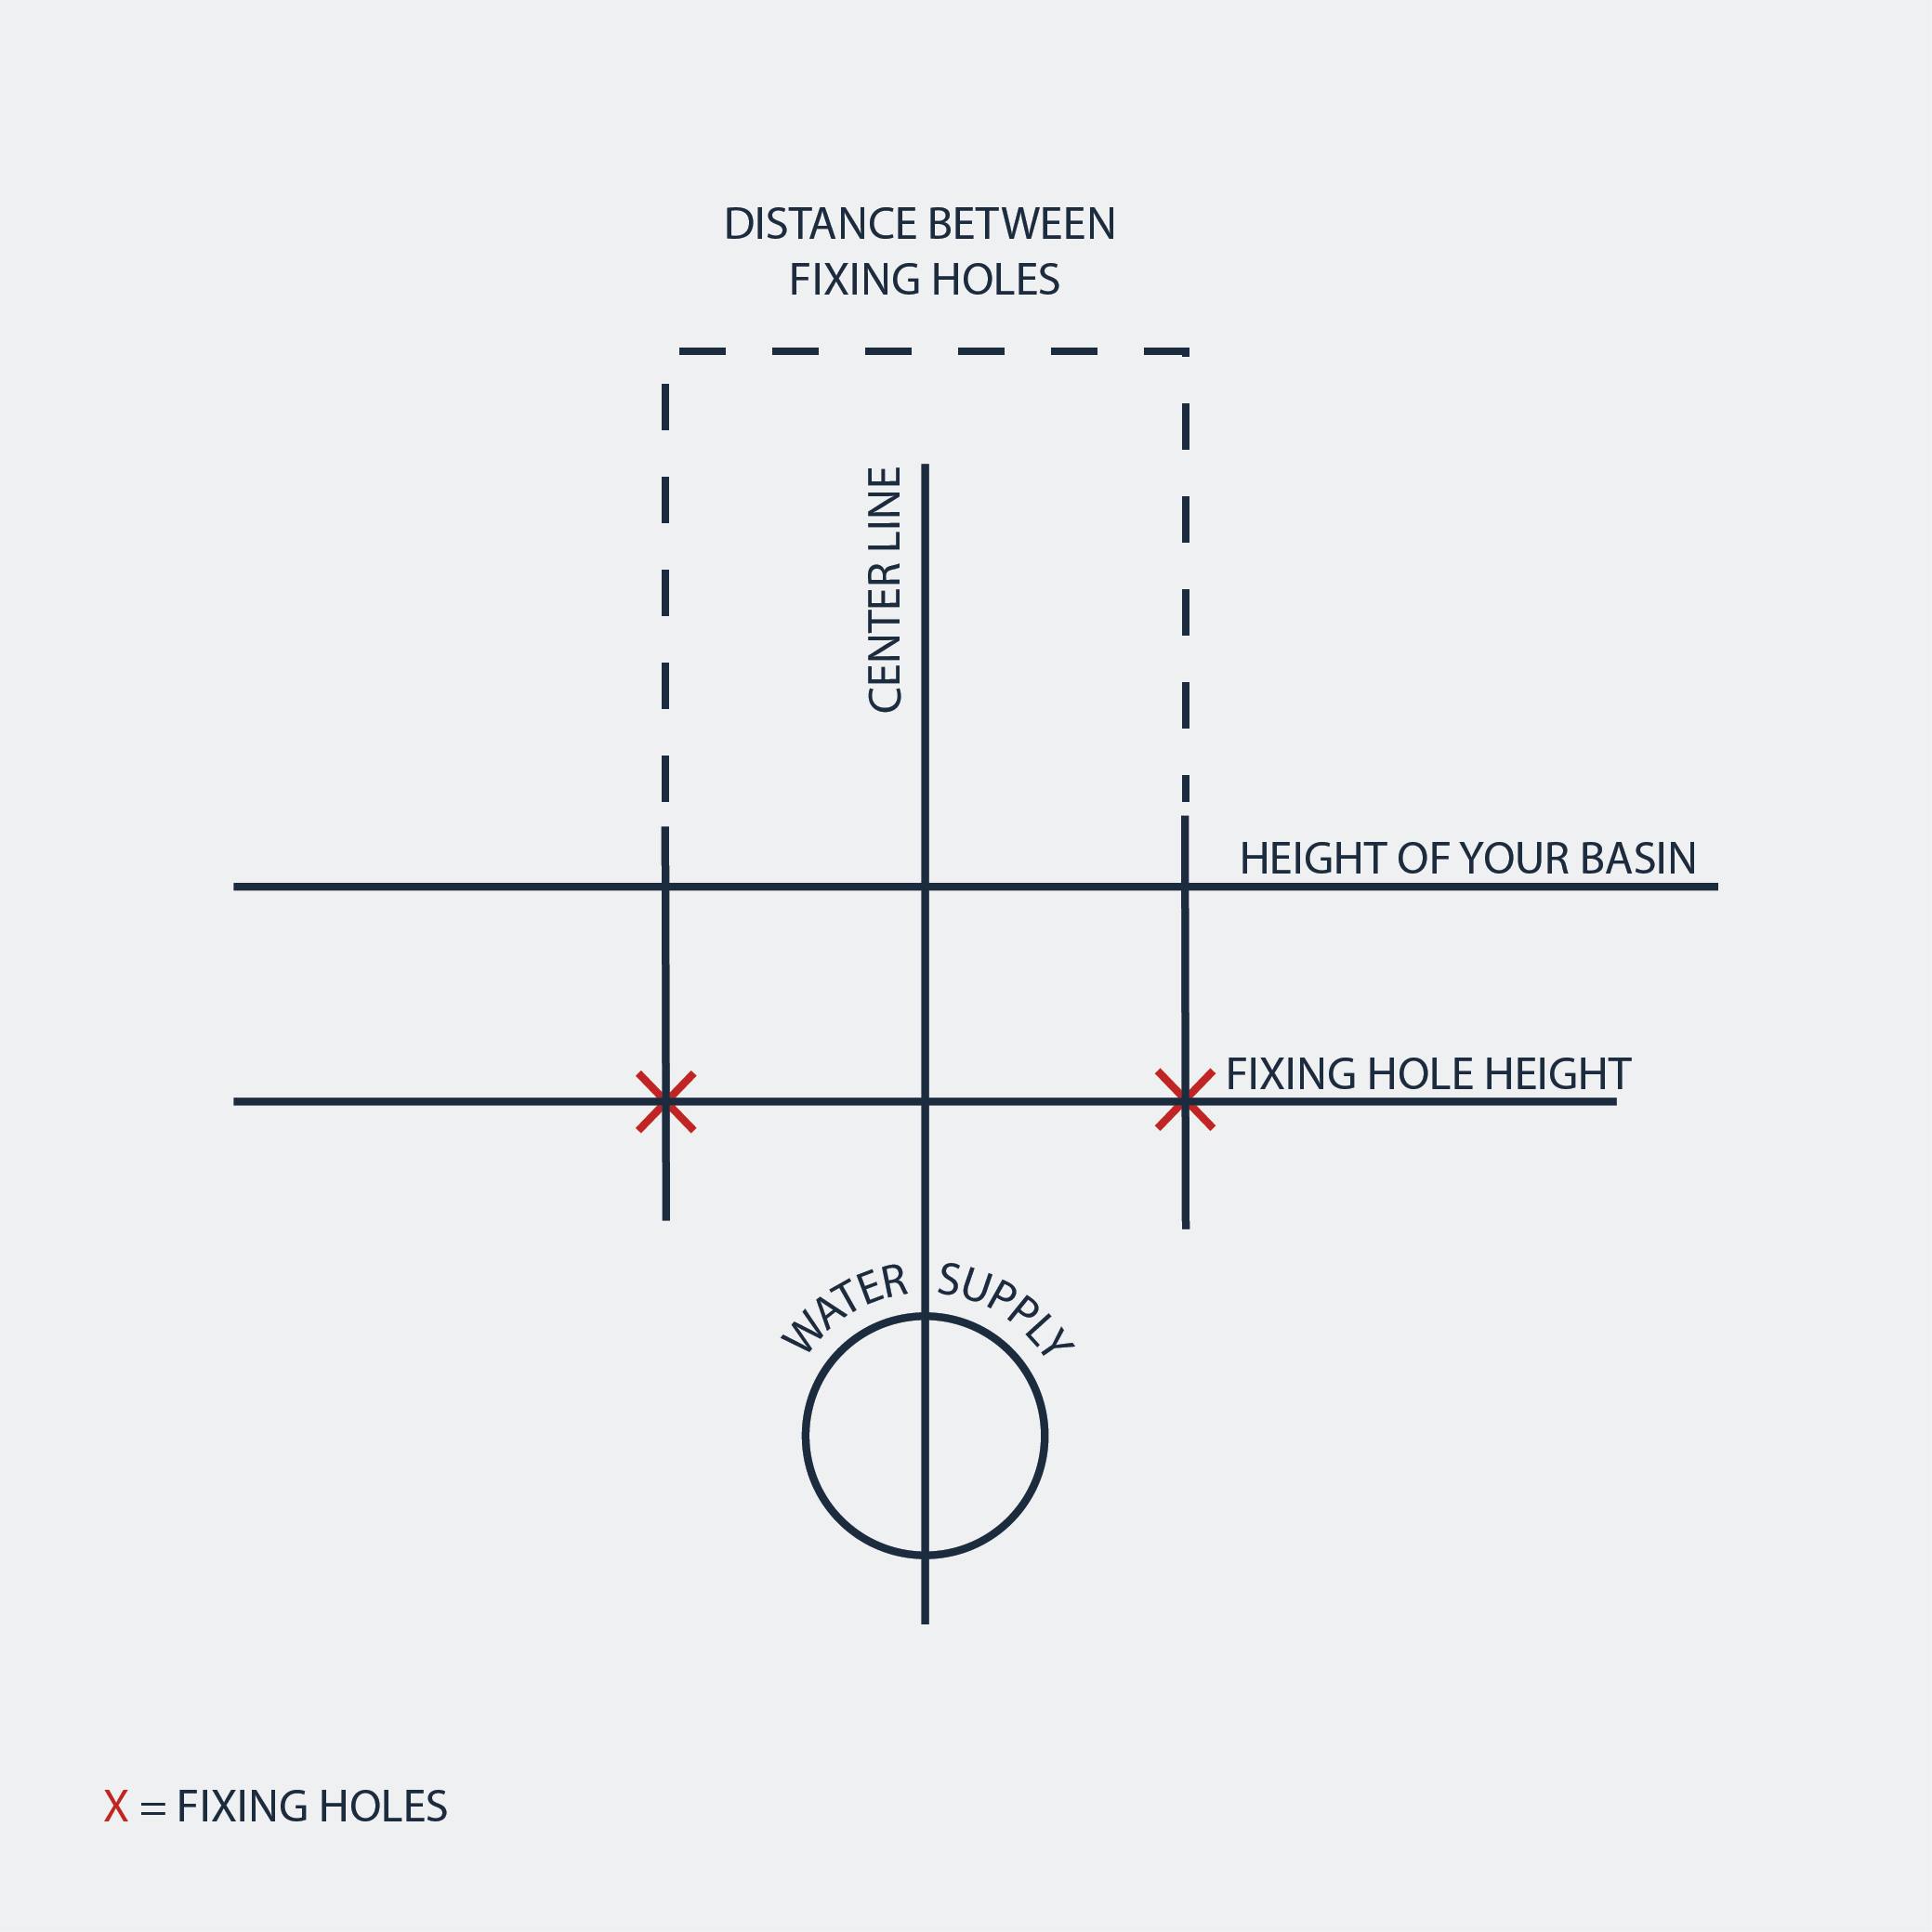
Mark the height of your basin on the wall with a pencil and extend the line out using a spirit level to ensure it is straight. Next, draw a straight line up from the water supply, to mark the centre of the basin.
Then, measure down from your top edge and use ‘measurement 1’ to find the height of your fixing holes. Draw this line onto your wall – use a spirit level to make it perfectly horizontal.
Finally, measure outwards from your centre line and mark the position of the two basin fixing holes using ‘measurement 2’. Your final markings should look like the diagram below.
Now you have the location for your wall anchors.
 Top tip: If you can’t draw on the wall or if you’re working on a tiled surface, apply some masking tape and draw over. This will also stop the drill bit from slipping and give you a clean finish.
Step 4 – Drill your anchor points
Before you drill the anchor points, we recommend that you check:
- You’re not above any electrical sockets or hidden pipes
- The wall you’re drilling into can bear a load
- You’re wearing the appropriate protective eyewear
If you’re unsure whether or not your wall fits these criteria, look into hiring a professional.
Otherwise, drill your fixing holes using an appropriate bit, making sure you hold it square to the wall. Then, insert your wall plugs, tapping them gently in with a hammer until they’re flat against the wall.
Top tip: If you need to attach any fixings to the sink we recommend doing this now, before securing the basin to the wall. Take a look at our taps and stylish accessories to add that finishing touch.
Step 5 – Fix your basin to the wall
For this next step, you may need a helping hand. First, insert the wall anchors into the wall plugs and tighten them using a spanner. Leave enough of the anchor thread protruding from the wall to attach your basin.
Set the basin onto the wall anchors and ensure it sits flush against the wall with a spirit level. Ask a friend to hold the basin steady and fit the flanged collar sleeve, washer and nut to each wall anchor. Double-check your sink is level and then tighten the nuts. Now your sink is attached to the wall.
Step 6 – Final Steps
Connect your water supply and check there are no leaks. Seal the back edge of your sink with some silicone sealant and leave it to cure. Once set, you have successfully installed your own wall hung basin. Congratulations!
Parting advice
If you found this helpful we’d love to see your finished bathroom on social media. Just tag your image with @betterbathrooms on Facebook or Instagram.
If you require any more information or assistance please call our customer services team on: 0330 332 8769.


 Back to top