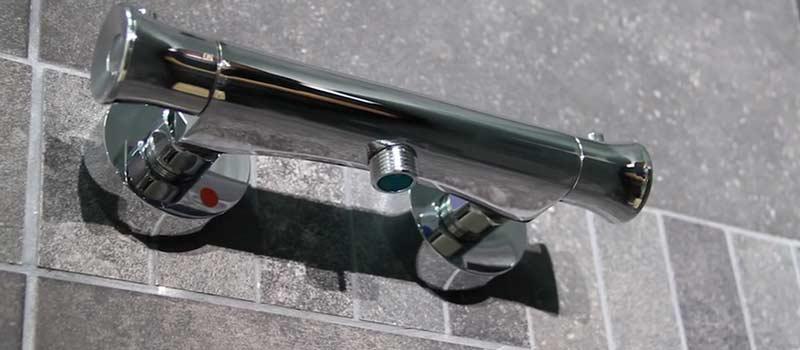
Learn how to fit a shower with this step by step guide to installing our eco slide rail kit and shower mixer. Get it right first time and save yourself time, money and effort!
Initial Checks
First, please ensure that your pipes are level and check that your pipe centres are 150mm apart. Your pipes should protrude from the wall no less than 25mm and no more than 30mm. You should also check your wall for any pipes or cables running up inside the wall which could be damaged when you drill your fixing holes. And finally, if your pipework is vertical, you should turn the back plate to a horizontal position when securing it to the wall.
Step One Preparing The Pipes
Apply masking tape to the wall immediately above and below your pipes, then slide one of the back plates over the first pipe and mark your drill holes. Repeat this action for the second pipe.
Now, drill your fixing holes, making sure that you use the appropriate drill bit and wall plug combination for your wall type. We recommend that you always wear suitable protective eyewear while drilling.
Remove the masking tape and insert wall plugs, then secure your back plates to the wall.
Slide an olive over your first pipe, followed by one of the round nuts. Tighten the round nut onto the pipe using an adjustable spanner. Then repeat this process for the second pipe.
Finally, screw a cover plate onto each of the round nuts.
á
Installing The Shower Rail
Tape the wall where youd like your shower rail to be. Make sure that the shower hose will not be under tension when fully extended adjust the positioning of your shower rail if necessary, to prevent this.
Remove the chrome caps from the rail brackets. Slide the bracket with the single hole onto the rail: this bracket will secure the bottom of the rail in place. Position the bracket and mark its location then, removing the rail and bracket from the wall, mark the centre point of the bracket on your wall.
Using a spirit level, draw a vertical line up from this centre mark.
Drill the fixing hole for the bottom bracket, and insert a wall plug. Secure the bracket to the wall, with the hole for the rail facing upwards.
Next, slide the other bracket (the one with two holes) onto the rail and, inserting the rail into the bottom bracket, position the top bracket as required on the wall, marking its position on your masking tape with a pencil. As before, remove the bracket from the wall and mark its centre point. Drill your fixing hole, insert a wall plug, remove your masking tape and fix the top bracket to the wall.
Remove the bottom bracket from the wall, and remove any last pieces of masking tape from the wall, too.
Fit the rail components onto the rail, with the sliders wider opening pointing upwards. Then, push the bottom of the rail into the hole on the top of the bottom bracket and slide the top of the rail through the top bracket. Align the hole in the rail with the hole in the bracket, slide a screw through the hole, and secure your bracket and rail firmly to the wall.
Finally, fit the chrome caps to the brackets and to the top of the rail.
Fitting The Shower Mixer
Push the filter seals into the mixer nuts on the back of the shower mixer. Connect the mixer nuts to the supply pipes, ensuring that the outlet is located on the underside of the mixer and the inlet with a red dot is on the left. Tighten the mixer nuts, using an adjustable spanner.
Fitting The Shower Hose
Insert the seals into the ends of the shower hose. Connect the nut end of the hose to the mixer outlet and tighten, then connect the cone end of the hose to the hand held shower, and tighten. Insert the cone end of the hose into the slider on the rail.
And youre all done thats how to fit a shower!
We hope you enjoyed our guide on how to fit a shower. For more information or to purchase any of the products featured in our installation guides visits our website www.betterbathrooms.com


